
(This site contains affiliate links to products. I may receive a very small commission for purchases made through some of these links, at no extra cost to you. By shopping through them you're helping to support my small business, and I really appreciate it! Ta Muchly!)
If you’re new to paper flower making, getting started cutting out your petals can be a bit daunting. But don’t worry, today I’m going to share with you my top 6 tips to help you cut out paper flowers from crepe paper. Keep reading or watch the video below to find out more.
I’ll be using one of my templates to show you as an example. If you’d like to give them a try I have lots of templates available on the template page, including some free ones. I also have another video on my YouTube channel showing you how to use a paper flower template too.
1. SHARP SCISSORS
So the most important thing you need to do to get started is make sure that you have sharp scissors. If you have blunt scissors then your paper is more likely to tear, and you’ll get rougher edges. It also means you’re probably going to have to cut one petal at a time. So I highly recommend you start with sharp scissors, and the best sort are the ones which cut right up to a point at the end, like these.
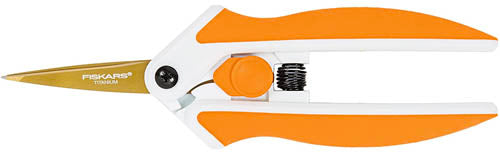
I like to use this scissor sharpener from Fiskars, which works really well with thinner blades like these. So I just do a few passes through the sharpener when I’m about to start cutting my petals.

2. CUT SEVERAL LAYERS AT A TIME
When you first start making paper flowers you’ll probably feel more comfortable cutting a single petal at a time. But once you get more confident you can start to speed things up by cutting several layers in one go. It’s really important that you have those sharp scissors to start with though. I recommend you try folding over 3 or 4 layers first, and see how crisp your edges are. That’ll give you a good idea how sharp your scissors are. If your scissors aren’t sharp enough, or if you have too many layers, then you’ll get rough edges that are a bit jagged. So you can try sharpening them, or cutting less layers at a time.
3. SAVE YOUR SCRAPS
There tends to be quite a bit of waste from cutting out petals, which can be frustrating as crepe paper isn’t always that cheap. So try to position your petals so that you’re minimizing the waste. Also remember that if you are cutting out several petals at once you’ll be left with pieces that are twice the size too. Make sure to keep the bigger scraps to one side, and you can use them to cut smaller petals from. I’ll have another video soon showing you tips for other ways to use your scraps, so stay tuned for that.
4. FOLLOW THE GRAIN LINES
Most templates will have lines to indicate the direction of the grain line in your paper. My templates have 3 little lines like this, so you need to line up the grain line with these. It’s really important to follow these, because getting the grain lines in the right direction can make or break your paper flower. Crepe paper stretches left to right, with the grain lines running top to bottom. It won’t stretch top to bottom, and you usually need to use the stretch to create shape in your petals. It’s also very common to use the grain line to actually add details, like with a leaf, you want to use the lines create a V shape so that it looks more natural.

5. WATCH FOR VARIATIONS IN COLOUR BETWEEN THE FRONT AND BACK OF THE PAPER
Some crepe papers have a very slight difference in colour or texture between the two sides. It’s not usually that obvious, and does depend what colour you’re using, but if you put them side by side there’s definitely a slight difference. I think it’s actually more to do with the depth of the texture in the paper, rather than the actual colour, but even when you use the paper stretched out, it can be noticeable. For most flowers its so subtle that it’s not really an issue, but if you’re making leaves, or petals made from 2 or more pieces, I recommend you cut your petals from the same side of the crepe paper.
6. TURN OVER THE LEAF AFTER GLUING TO ADD DETAILS
If you’re making flowers where you need to add details to the edges, it can be easier to do it after you’ve glued the petal or leaf. For example, if you’re making a rose leaf with these little notches in, I find it easier to cut the basic shape first, glue my leaf together, and then come back to add the details once it’s dry. The easiest way to get precise details is to turn the leaf over so that you’re cutting away from you, like this.
So there you go! I’ll have more videos with paper flower making tips and tutorials soon, so make sure you’re subscribed so that you get a notification when the next video goes live. You can also subscribe to my email list and then you’ll be the first to get notified when I launch new videos and templates, as well as get access to special discounts that I don’t offer anywhere else.
Until next time, happy flower making.
Michelle x